Contents
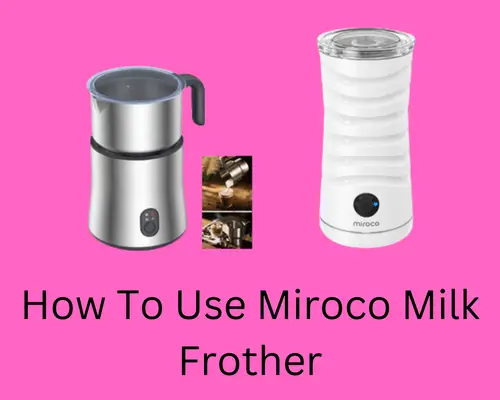
- How To Use Miroco Milk Frother?
- How To Use Miroco Milk Frother For Coffee?
- How To Use Miroco Milk Frother For Cold Brew?
- Is Miroco Milk Frother Work For Almond Milk?
- How To Use Miroco Milk Frother For Almond Milk?
- How To Use Miroco Milk Frother For Latte?
- How To Use Miroco Milk Frother For Cappuccino?
- How To Use Miroco Milk Frother For Hot Chocolate?
- How To Use Miroco Milk Frother For Matcha?
- How To Heat Milk In Miroco Frother?
How To Use Miroco Milk Frother?
You might have recently bought a Miroco milk frother but do not know how to use it properly. There is no need to worry. You have come to the correct place. We have shared a step-by-step guideline for using a Miroco milk frother.
Before the first time use
Take off and safely throw away any labels or packaging that came with the milk frother.
Follow these steps before you use it for the first time:
- Wash the milk jug, frothing whisk, and lid in warm water with a bit of dish soap.
- Rinse well and let dry.
- Clean the outer area of the power base with a damp cloth then let it dry completely.
Step 1:
Set the power base with the milk jug on a flat, level surface and plug the power cord into a power outlet.
If the milk jug isn’t placed firmly on the power base, the frother won’t work, and the red light will blink for 5 minutes after you press the Power Button.
Step 2:
Pour the right amount of milk into the pitcher and put the lid back on. Connect it to a power source, and it will beep and go into standby mode. To start heating or frothing, press the Power Button. The LED indicator will light up and start flashing during the process. After three short beeps, it will turn off. When milk is frothed, it will warm up.
Step 3:
For better results, it’s best to use whole milk (with more than 3 percent fat).
The frother can heat the milk to 149 41°C (65 5°C). When the milk is heated, a small amount of foam will form.
Choice of Mode
- To turn on the milk frother, press the Power button once. To switch to the next mode, press it again within 2 seconds. To choose the method you want, press the button within 2 seconds each time.
- When you press and hold the Power button for 2 seconds, the icon for one of the four modes will light up.
- If you press the Power Button once while the milk frother runs, it will go into Standby mode. If you press the button again, the frother will start with the last mode you chose.
Always turn off the power to the appliance when you’re done using it and before you clean it.
How To Use Miroco Milk Frother For Coffee?
If you want to use hot milk, the temperature should be between 150 and 155 degrees Fahrenheit. Now follow the guideline to make coffee on a Miroco milk frother.
Step one:
Fill the pitcher with the appropriate amount of milk. Now Put the whisk to make foam) into the milk jug. Pour 500ml of milk and 60g of coffee powder into the pitcher. Please don’t remove the frothing whisk when adding milk and coffee powder. It will help them mix better.
Step two:
To choose the Frothing & Heating Milk mode, press and hold the Power button for 2 seconds. When you set the heating and frothing mode, the U will light up red. When done, the U will flash red for 30 seconds and then turn it off.
Step three:
Finally, Pour the coffee into a mug and add sugar or any of your preferred sweeteners. To have high-density foam, always use whole-cream milk.
How To Use Miroco Milk Frother For Cold Brew?
Did you know you can make a cold brew using a milk frother? We have shared step-by-step guidelines on how to use a Miroco milk frother for cold brew.
Step 1:
- Mix ground coffee and water in a large pitcher or jar.
- Let it chill for 12 to 24 hours in the fridge.
- Pour the coffee concentrate through a strainer.
- Put the frothing whisk inside the milk jug (without the chocolate cover).
Step 2:
Fill the jug with milk. Don’t go over the MAX level for foaming (250ml).
To choose the Frothing Cold Milk mode, press and hold the Power button for 2 seconds.
Step 3:
The -8 will light blue to start frothing cold milk. Once the job is done, the -8 will flash blue for 30 seconds and then turn off. Now run the foamy milk over the premade coffee. Your cold brew is ready.
Is Miroco Milk Frother Work For Almond Milk?
Yes, the Miroco milk frother works for almond milk. But it takes a bit of skill and effort to get almond milk to foam. While making the perfect latte, getting the proper foam is essential. In recent years, almond milk lattes have become popular.
You can easily create foam with High fat and lactose milk. But nondairy milk is tricky. Even when you limit it to almond milk, there are numerous options at the grocery store. In comparison, it’s great to have so many options; choosing the incorrect one to make lattes might leave you unhappy.
But it is possible to create the perfect light, fluffy foam with almond milk. You have to make sure you get the right kind of almond milk and follow the right steps.
How To Use Miroco Milk Frother For Almond Milk?
We have already stated how vital it is to choose suitable almond milk to create a good foam. Now we will share a step-by-step guideline on how to use a Miroco milk frother for almond milk. Before you proceed, make sure
- The almond milk is fresh
- Use cold milk or freeze it before making
- If you are using store-bought almond milk, ensure it has high protein.
Step 1:
- Connect the frother to a power outlet.
- Pour your cold almond milk into the container made of stainless steel.
- Don’t pour more than the minimum or maximum.
- Put the lid on.
Step 2:
To choose the Frothing Milk mode, check above. We have shared how to select different modes. Suppose you have taken cold milk to choose the Frothing Cold Milk mode, press and hold the Power button for 2 seconds. To start frothing cold milk, the -8 will light up blue. Once the job is done, the -8 will flash blue for 30 seconds and then turn off.
Step 3:
Your frothing almond milk is ready. Take your time to create the foam, as almond milk is nondairy.
How To Use Miroco Milk Frother For Latte?
A latte is a coffee drink assembled with espresso, steamed milk, and foam. You may wonder if making a latte with milk frother is possible. Yes, it is, and we have shared a recipe with proper guidelines on using a Miroco milk frother for a latte.
Step 1:
You need to make the espresso first for this recipe. For that, first, make a solid-flavored coffee. We have shared above how to make coffee with a Miroco milk frother.
Step 2:
At this phase, you need steam milk. Set the frother mode to stirring and heat. Fill the jug with milk. Don’t heat more than the 0 MAX Level (500ml).To choose the Stirring & Heating mode, press and hold the Power Button for 2 seconds.
Step 3:
To finish our latte, you need the foam. Set the frother to heat and frothing mode. Fill the jug with milk. Don’t go above the MAX Level for Foaming (250ml).
To choose the Frothing & Heating mode, press and hold the Power button for 2 seconds. The light will turn red when the milk starts to froth and heat up.
Now layer the latte. First, pour the espresso into a mug, run the same milk on it, and finish it with the foam. Your latte is ready.
How To Use Miroco Milk Frother For Cappuccino?
Making a cappuccino without a coffee machine seems complicated for many people. But did you know you can use a Miroco milk frother for a cappuccino? We have shared a proper guideline below.
First step:
First, make a good espresso. Espresso is a bitter taste coffee. Use a milk frother to make an espresso.
Second step:
Put the frothing whisk inside the milk jug (without the chocolate cover).
Fill the jug with milk. Don’t go above the MAX Level for Foaming (250ml).
To choose the Frothing & Heating mode, press and hold the Power button for 2 seconds.
Third step:
The light will turn red when the milk starts to froth and heat up. When done, the • will flash red for 30 seconds and then turn off. Now pour this foamy milk on the espresso. You can also sprinkle some chocolate powder for garnishing.
How To Use Miroco Milk Frother For Hot Chocolate?
Everyone loves hot chocolate. You won’t have to go outside anymore for hot chocolate. Follow our step-by-step guidelines using a Miroco milk frother for hot chocolate.
Step 1:
Put the whisk for making foam (with the chocolate cover) into the milk jug.
Pour 500ml of milk and 60g of chocolate powder into the jug. Please don’t take the frothing whisk away when adding milk and chocolate. It will help the drink to mix better.
Step 2:
To choose the Frothing & Heating Chocolate Milk mode, press and hold the Power button for 2 seconds.
Step 3:
If you want to start heating and frothing chocolate milk, the U will light up red. When done, the U will flash red for 30 seconds and then turn it off. After the process is done, pour the chocolate milk into a mug.
How To Use Miroco Milk Frother For Matcha?
Matcha tea is excellent for our health and well-being. The tea contains anti-oxidants, and now you can make it with a Miroco milk frother.
Ingredients
- 1 ½ cups milk of choice – almond, coconut, soy, cow, etc.
- One teaspoon matcha
- 1-4 teaspoons liquid sweetener of choice – honey, maple syrup, agave, or a few drops of stevia
Step 1:
Warm up the type of milk you want. Set the frother mode on stirring and heat. To choose the Stirring & Heating mode, press and hold the Power Button for 2 seconds. The “7” will light up red when you start stirring and heating. When done, the “7” will flash red for 30 seconds and then turn off.
Step 2:
Add your matcha and optional sweetener of choice to the frother. Choose the frothing and heating mode now. To select the Frothing & Heating mode, press and hold the power button for 2 seconds.
Step 3:
Once everything is mixed well and at the temperature you want, pour it into a mug and enjoy!
How To Heat Milk In Miroco Frother?
It is effortless to heat milk in a Miroco electric milk frother. Follow our step-by-step guidelines to heat milk.
Step 1:
Put the frothing whisk inside the milk jug (without the chocolate cover).
Fill the jug with milk. Don’t heat more than the 0 MAX Level (500ml).
Step 2:
To choose the Stirring & Heating mode, press and hold the Power Button for 2 seconds. The “7” will light up red when you start stirring and heating. When done, the “7” will flash red for 30 seconds and then turn off.
Step 3:
Once the milk jug is taken out before the lights go out, all red lights will flash for 5 minutes until the power is turned off or the milk jug is put back into the power base.

